It took until the end of July to get the Atego weighed. I was pleased to find that it weighed in at just 5'660 kg, which should give me enough leeway for the conversion and registering it as a motorhome. Let’s see how long it takes me to do that.
What can you find in this post?
Disclaimer: The company links are included here not because I am paid to do so, but because in some cases I spent a very long time searching for this information and would like to give others a starting point. Please bear in mind when this post was published and note that no guarantee is given as to the accuracy of the content or external links.
Why register as a motorhome?
The aim is to register the vehicle as a motorhome, because in Germany a vehicle registered as a motorhome with a maximum authorised mass (MAM) of 7.5-tonnes is, above all, permitted to:
- drive at 100 km/h on motorways and expressways; a lorry in the same weight class is generally only permitted to drive at 80 km/h on these roads. On country roads, the speed limit remains 80 km/h. 12th Exception Regulation to the Road Traffic Regulations (StVO)
- as a rule, continue driving where there is an explicitly signposted ban on lorries, provided no additional restrictions regarding weight, width or other factors apply. Legally, a motorhome is not classified as a lorry.
- A 7.5-tonnes vehicle registered as a motorhome is exempt from tolls in Germany, provided it is actually used as a motorhome. In most EU countries, a 7.5-tonnes motorhome is not exempt from tolls. In most cases, the weight, number of axles, height or vehicle class is what counts – not its use as a motorhome.
When crossing the border within the EU, a 7.5-tonnes motorhome generally does not have special status like a lorry: within the Schengen Area, there are usually no regular border checks, but you must carry your vehicle documents, driving licence and proof of insurance. During checks, registration as a motorhome is what counts. Do not automatically take the lorry lane at the border: always use the lane indicated by the signs.
Important: In general, privately used motorhomes weighing up to and including 7.5-tonnes do not need a digital tachograph. The EU exemption for non-commercial journeys applies to vehicles weighing up to 7.5-tonnes.
Important: The general ban on overtaking for vehicles over 3.5-tonnes also applies to a 7.5-tonnes motorhome unless it is expressly exempted by an additional sign. Where there is a weight restriction on the route, it is always the authorised gross weight that counts, not the current actual weight.
Every beginning is difficult – Expansion
I’d hoped it would get easier now, but I was wrong yet again. This is what the Atego 1018 looked like in January
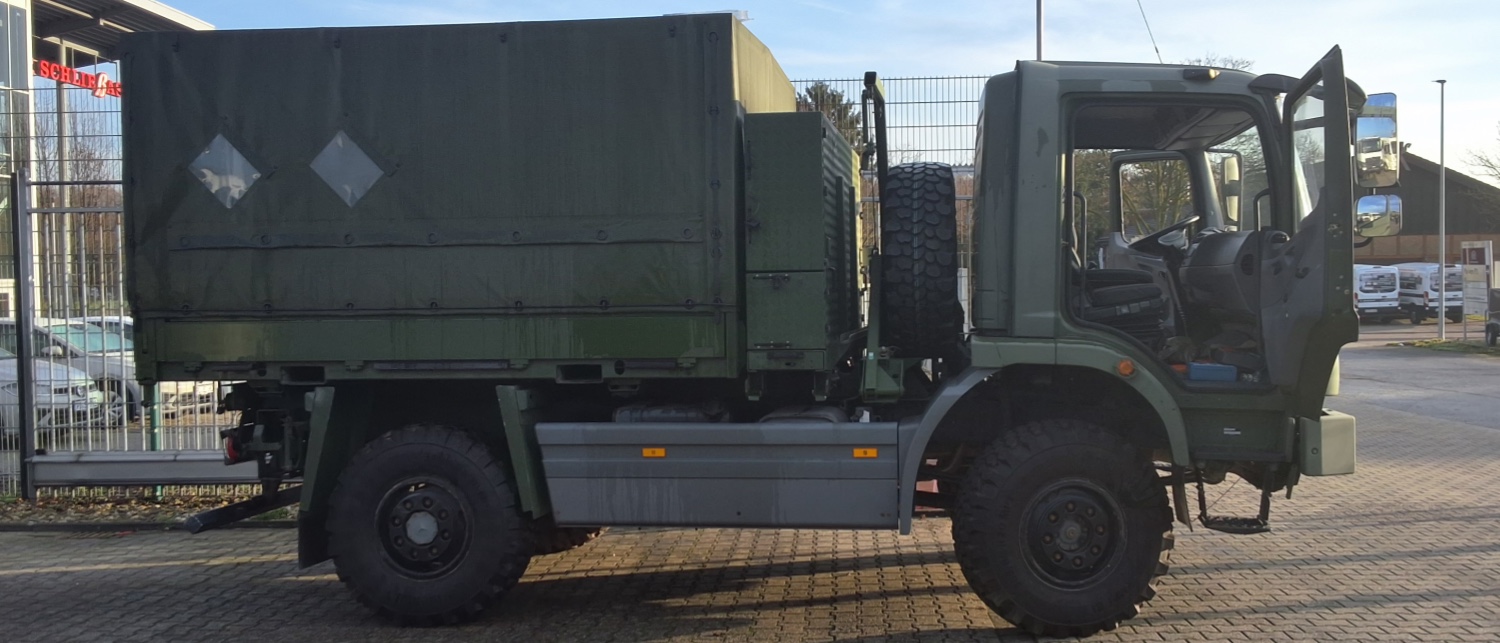
And so, at the end of July, after the unloading and the MOT
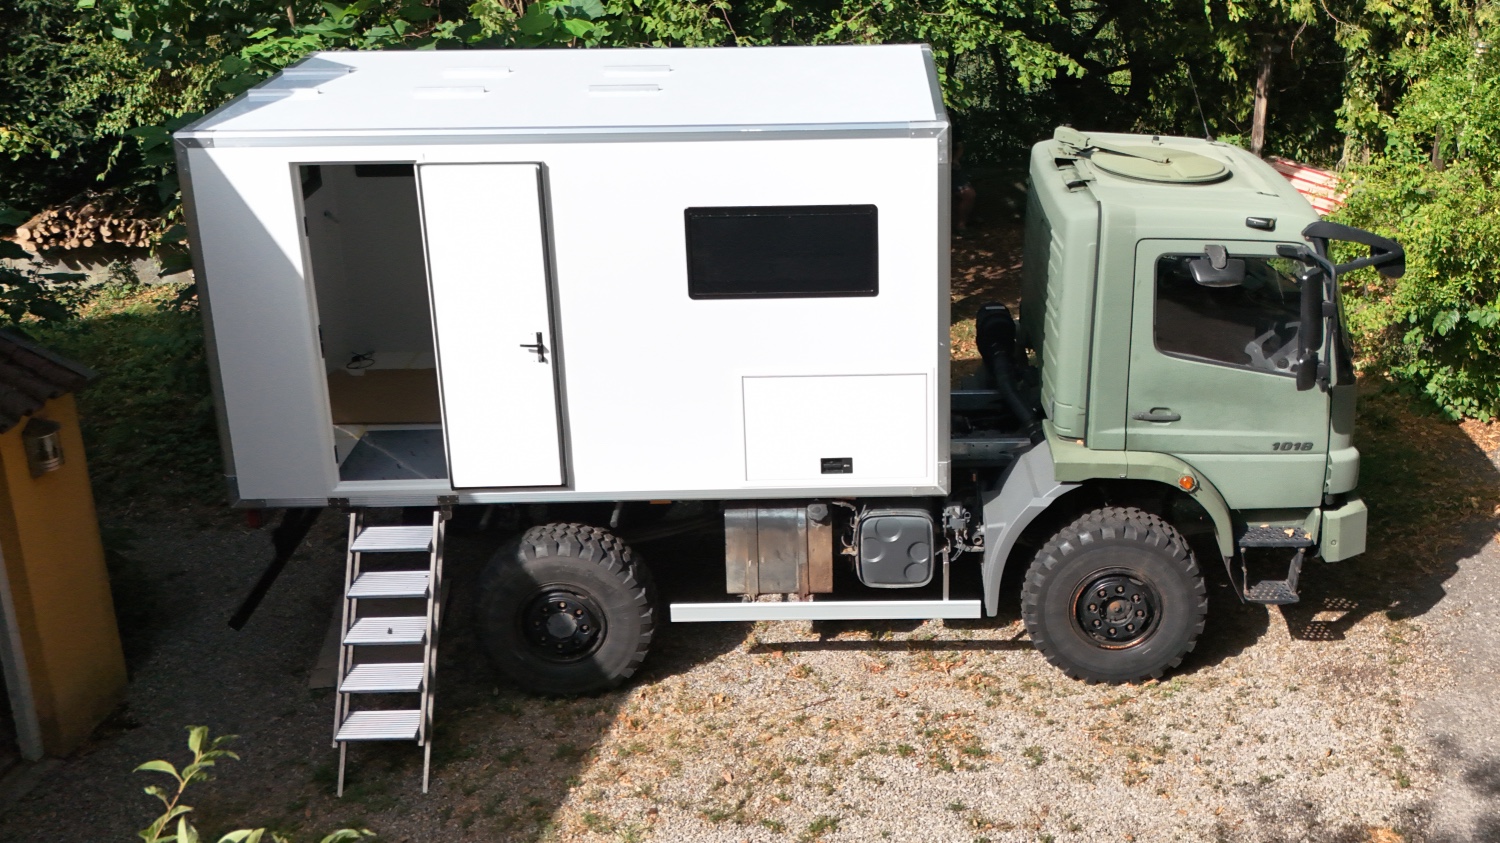
After that, work began on the interior fit-out and further modifications.
Phase 3: Start of expansion
I’d given quite a bit of thought to what I wanted to do and in what order.
- Painting the roof and then the Atego
- Solar panels on the roof and cable routing. Fitting the reversing camera at the same time
- Building the bathroom and garage – this would give me reference points for building the furniture, including a shelf to support the bed base
- Installing the water tank in the garage and the grey-water tank
- Cable routing for D+, connection to the starter battery, earthing
- Laying the flooring
- Building the en-suite bathroom 🧐
- Storage boxes, as I would route the cable feed from (5) through the storage box. My shore power socket would also be located in this storage box
- Battery mount
- Aluminium profiles for the seating area to accommodate the electrical wiring
- Wiring and installing the electrical system
- Wiring and fitting the heating and hot water systems
- Building the kitchen and cupboards from aluminium profiles
- Fitting the fridge
- Fitting the worktop, hob, sink and oven
- Cutting and fitting the furniture fronts
Paintwork, the 1st attempt
A standard paint job, in a simple finish, was expected to cost easily more than €7'000, and I was looking for something a bit cheaper. I’d opted for a graffiti-style paint job by local artists. In the first half of the year, we’d carried out tests with spray paint and clear varnish, which had convinced me. The paint, including the clear varnish, proved hard enough to withstand similar stresses to those in South America. The alternative, and my backup plan, was Raptor.
Before I could secure the roof hatch and solar panels to the roof, the roof needed to be painted in a high-visibility colour. So much for my plan.
The shade was called Terra di Siena. Once the roof surface had been degreased, Jochen applied the paint. It looked good.
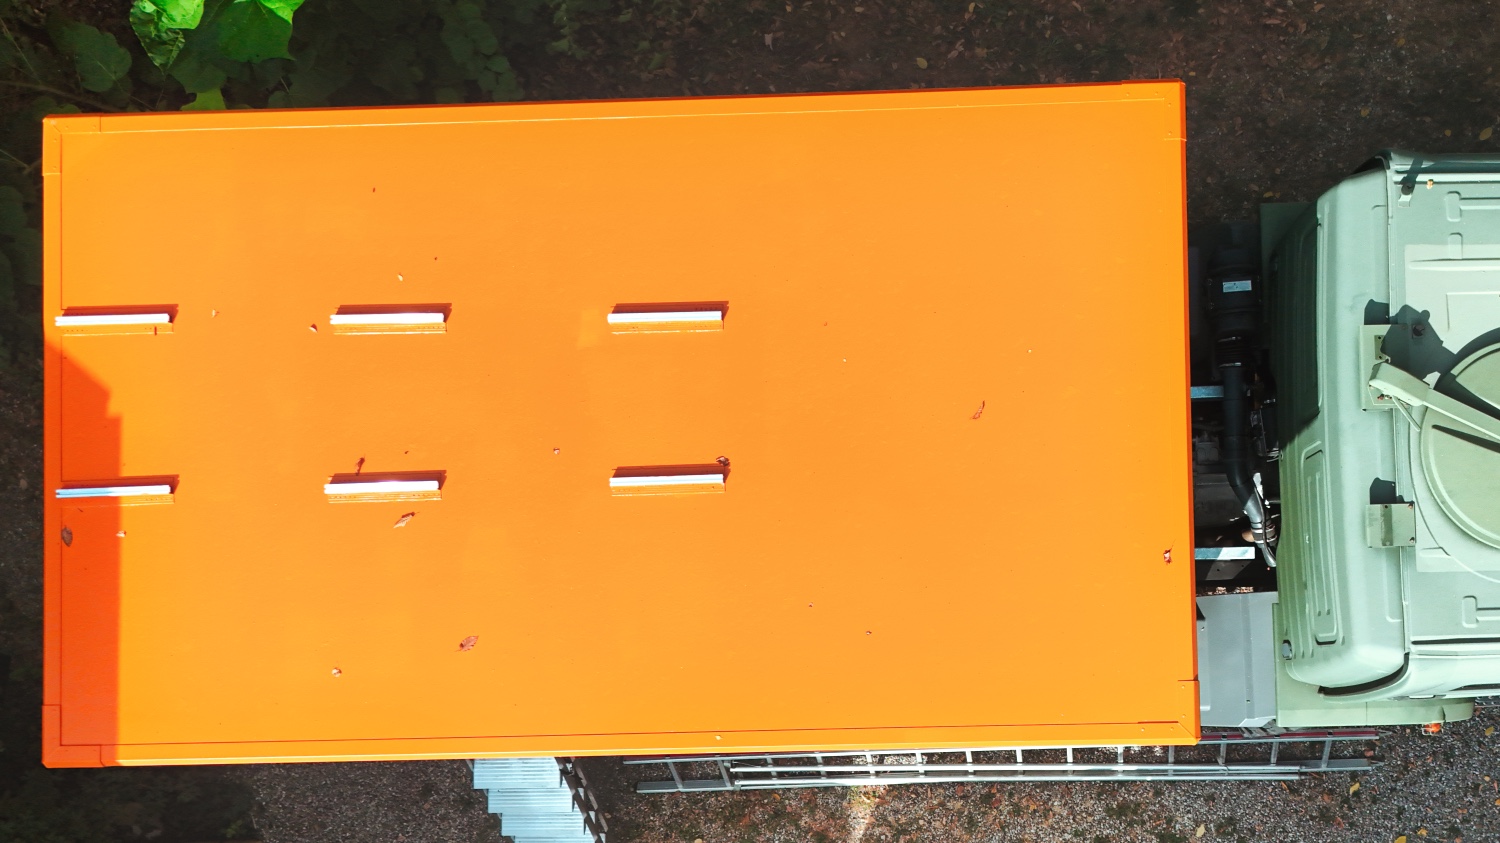
Why did I call this chapter ‘First Attempt’? Because the paint took to the roof surface quite unevenly. At the end nearest the garage, it was more like a film that you could simply peel off. The problem became obvious when I was cutting out the skylight opening, and I was quite frustrated. But what could I do!
The rest of the surface behaved as expected. I realised this when I tried to remove the paint. As sanding the entire roof would have taken quite a long time, I decided to use an eccentric sander to clean up the parts where the paint came off easily! Not perfect, but practical! It took 5 hours to apply the paint and 2 hours to remove it in places. Cost so far: approx. €75.
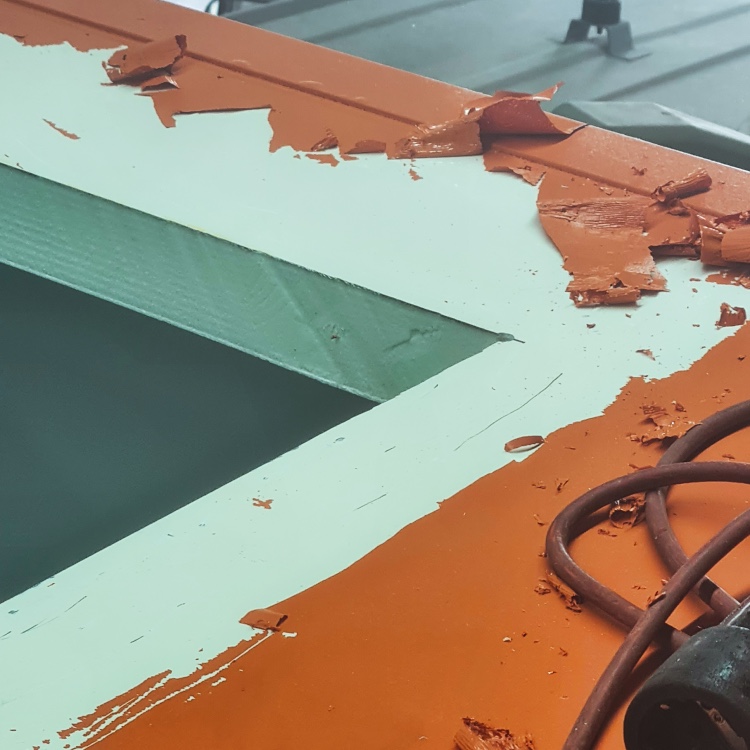
After further tests on the roof cut-out, I decided to go for spray paint (MONTANA BLACK by MONTANA CAN) and clear varnish (CROP 2K clear varnish).
After another two sessions, that was sorted too. Spraying the WSB outdoors was manageable in summer when it was over 30 degrees and dry, but in October, with worse weather and falling leaves and seeds, it was more of a challenge.
en-suite bathroom
My bathroom would be a manageable size: 130 x 80 cm, right next to the entrance. The inner door to the cubicle was intended, on the one hand, to conceal the toilet and, whilst showering, to prevent water from splashing into the living area.
I had the shower tray made to my specifications by Maschinenbau Feld, and I built the separation toilet from an EcoShit kit. The walls were constructed from TZ Austria’s EPS 200 lightweight panel (16 mm thick). Why?
- 100% waterproof
- high impact and bending strength
- good screw pull-out resistance
- easy to work with and edge-band with PU or hot-melt adhesive
- can be coated with HPL, CPL or primer film
It was, and should be, easy to work with! With a bit of finesse when routing, the board can be worked almost like wood. Drilling holes and working with a jigsaw, on the other hand, wasn’t ideal, as it left unsightly edges on the reverse side.
The problem was the door to the interior. Given my height and weight, I needed a door with a 180-degree opening angle. Otherwise, I’d never be able to get out of the shower. Carloflex 410 was used for bonding.
To cut a long story short, I’d opted for a pivot hinge/pivot hinge strip. As there were almost no off-the-shelf options available for a door thickness of 16 mm, I built it myself using aluminium U-profile, cylindrical pins, compression springs and spacer sleeves.
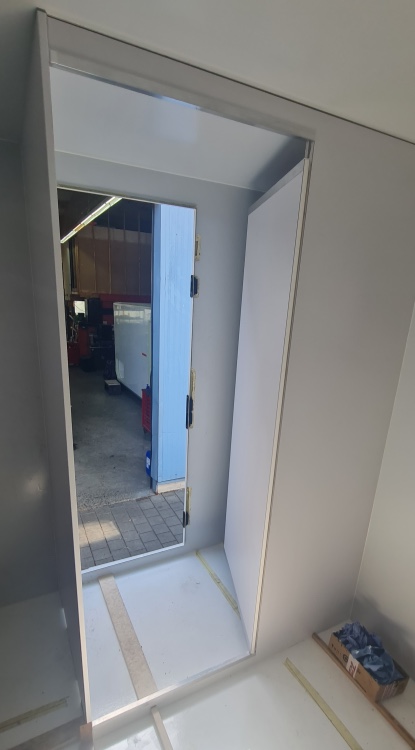
At AluStar, I saw first-hand how it was done from a practical point of view. I wasn’t much more than a handyman. The mere fact that the wall didn’t extend all the way up to the roof was new to me.
Just choosing the door bolt took nearly two weeks. Either they were functional but looked rubbish, or they were too big.
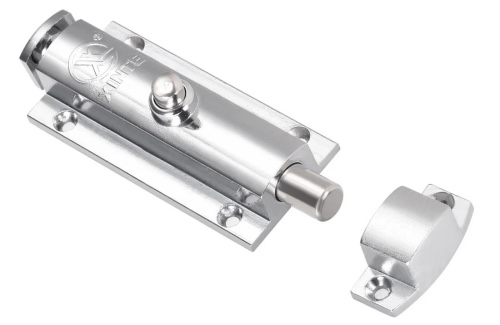 |
But I was lucky and found a sliding cylinder security lock with a spring-loaded switch. A good example of terms I’d never have thought of on my own and only came across by chance. |
I’d had standard drains fitted to the shower tray. The inner drain was positioned above the sub-frame 🫣. I had to have a second shower tray made with an offset drain.
As the shower tray was glued in place, I’d drilled the drain holes larger so that I could replace the siphons from the outside if necessary.
Then I moved on to the toilet and the shelf in the wet room. I cobbled it together using the leftover pieces of my EPS 200 panels. The good thing was, I could use the graffiti paint to contrast the shelves and visible parts of the toilet and hide any mistakes 🫣
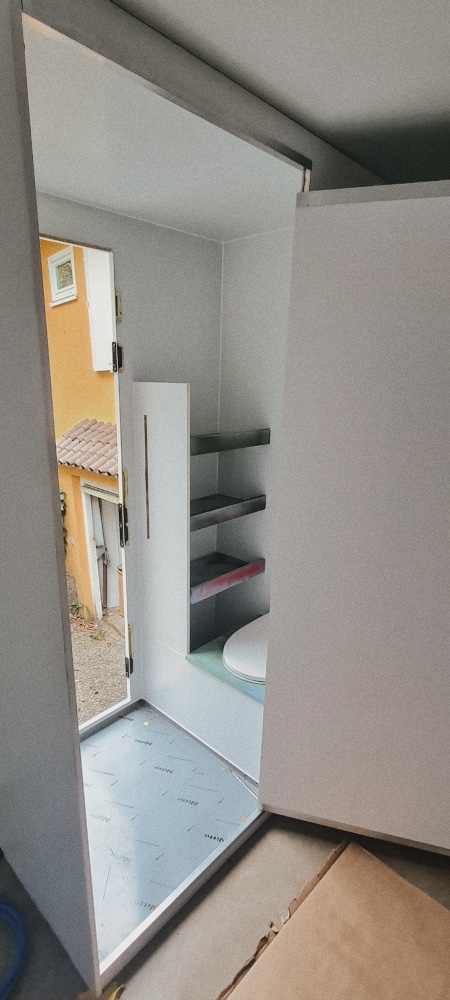
That’s why I chose the following slogan for the SÄK.LE:
“La perfección es una pulida colección de errores.”
by Mario Benedetti (Uruguayan journalist, poet and writer.)
Meaning: Perfection is a polished collection of mistakes. / Perfection is a polished collection of mistakes.
If anything applies to me, it’s that!
Storage boxes and Grey-water tank
AluStar had built me an external mount for the waste water tank, so all I had to do was connect the waste water hoses. I’d decided against a tank heater. These were my reasons
- I’m not a winter camper, and if necessary I can let the warm waste water run through directly
- The tank was made of 10 mm plastic, and a Lilie Ultra Heat tank heater would have been rather ineffective
- Wrapping it in Armacell ArmaFlex was rather impractical
- A frost protection cable or pipe trace heater made little sense given the short length of the pipes
For the storage boxes, I’d opted for aluminium chequered plate boxes with sliding lids from Edelstahlhaus. Simple, dust- and watertight storage boxes that I would glue and rivet in place as under-bench units. No bespoke boxes, as they cost more than double and the storage boxes weren’t that important to me. We were able to cancel the first order before it left the warehouse, as we hadn’t taken my stair bracket into account
Two weeks later, the new storage boxes arrived, and the bracket wasn’t quite what I’d envisaged. Even so, fitting the three boxes would have been a relatively quick job. I just had to move my AdBlue tank 10 cm because of the bracket. More unplanned costs!
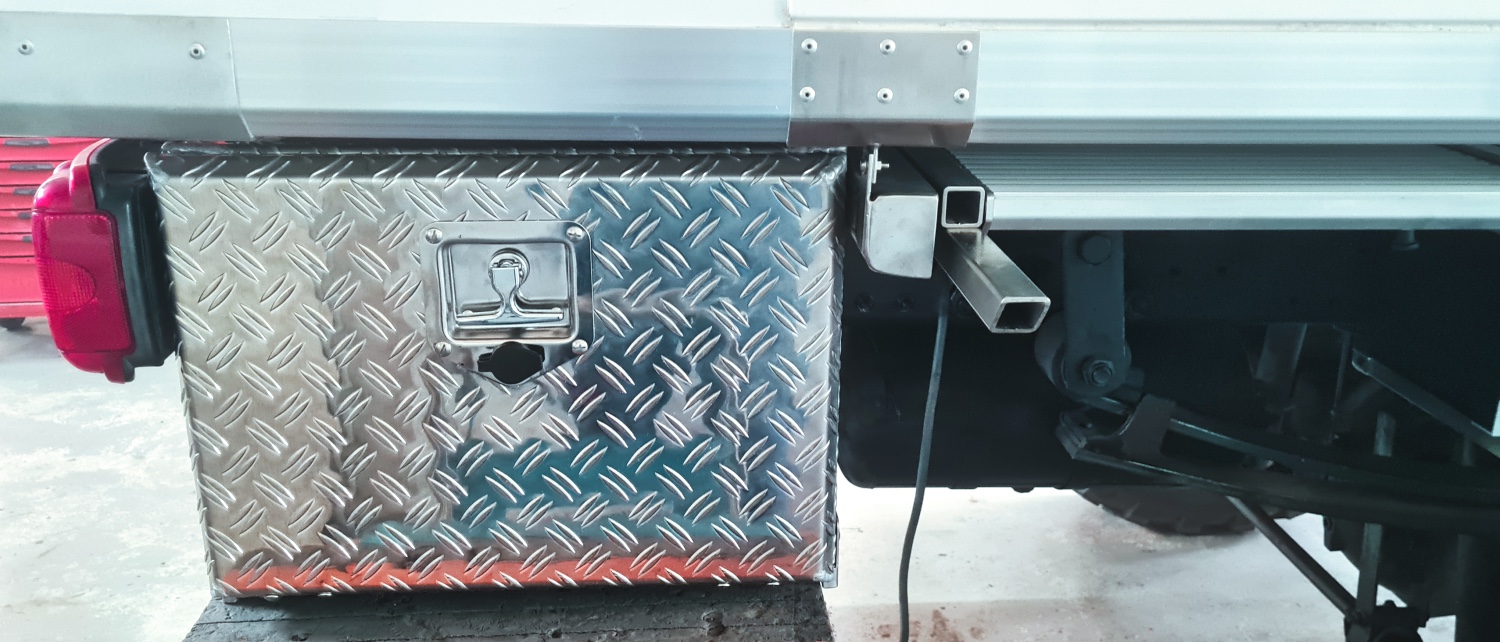
By that point, I had also drilled the second hole in the floor for the cable feed-through (D+, earth, shore power, battery connection, etc.). The end was to be routed into a storage compartment, as this allowed me to reduce the number of holes in the cabin to eight (shower (2x), upper rear position lights (2x), waste water sink, roof cable feed-through for solar panels, shore power cable feed-through, etc. and auxiliary heating). The first hole was slightly off-centre due to the offset.
Before fitting the last storage box, I’d drilled the holes for the earth connection on the vehicle frame and cabin frame for a 16 mm² cable and secured the cable with screws. Inside the storage box, each cable had its own cable gland, and I’d fitted an extra one as a spare.
Back at home, I then fitted the plug for the shore power. I thought about it for a long time and eventually opted for the more expensive, but also smaller, MP16 / 16 A / 230 V / male / plastic plug instead of a CEE plug. The cable didn’t cost a fortune either. Whilst drilling the holes, I also had to buy two more hole saws (48 and 55 mm). The second one was for the water connection.
After I’d collected the Wabi-Sabi Benz from Murg, it was time to tidy up and sort out a few other things. And after six hours, it looked a bit tidier. But that’s what a day looked like.
Storage space & bed
I’d learnt that I should have two fixed points in the cabin. At the front, it was the wet room, and at the back, it would be the storage space and the bed. It wasn’t planned that way, but I adapted the plan. Before I set about cutting the boards to exact measurements, I learnt that I should allow for a margin to account for the thermal expansion of the cabin. That made my life easier, as it meant I could simply determine the dimensions. I wouldn’t glue them in place straight away, as the shelf under the bed would be built and positioned first. I wanted to save myself the faff of trying to get that part under the bed later on.
So I cut my first four 20x20 aluminium profiles and angle brackets to size, according to the plan. It didn’t fit at first. By the end of the day – after shortening the profiles, re-drilling the holes and putting it all back together – it finally fit. I planned to use two Euroboxes per shelf compartment, so that I could also get the boxes out of the storage space.
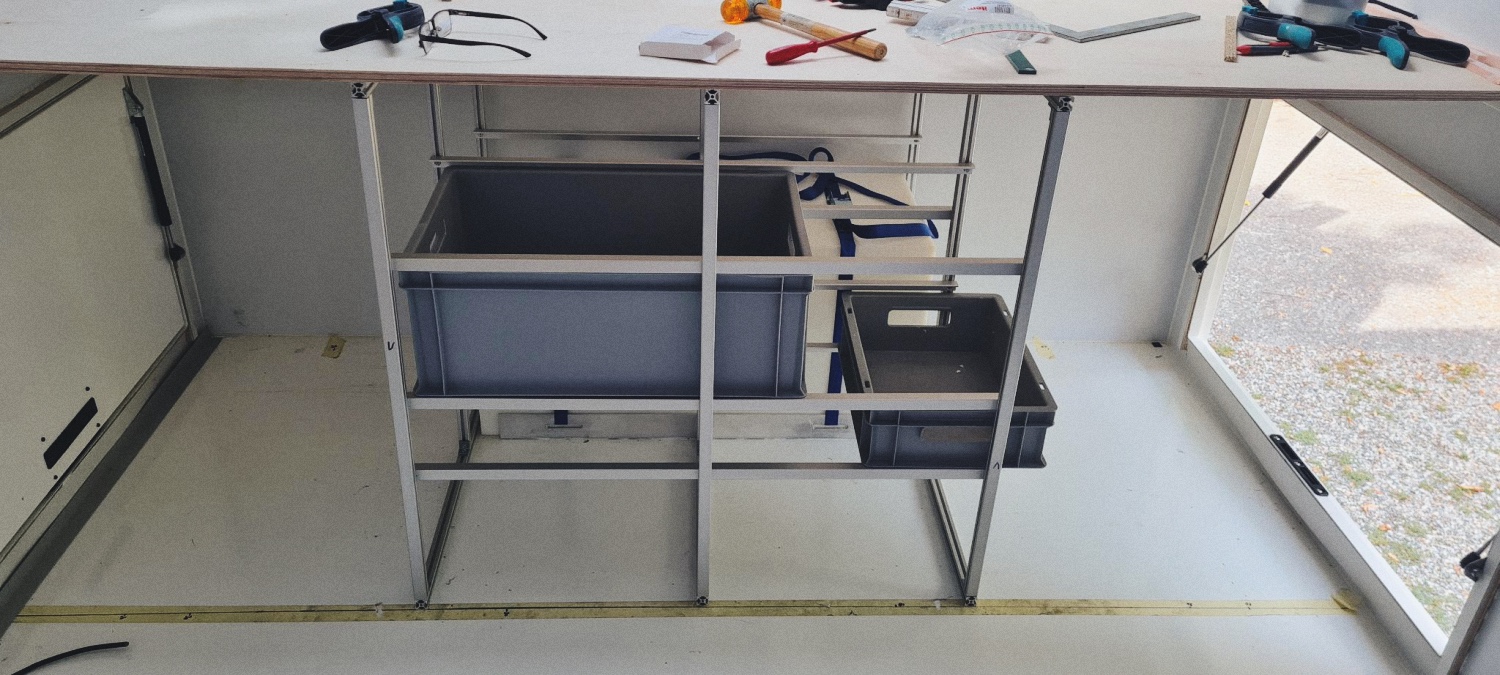
If everything took that long, I wouldn’t finish this year.
As I stood there in front of the frame, it became clear to me that I’d have to fit the water pipes under the bed before gluing the bed base and front panel in place. I really didn’t want to put my back through the ordeal of fitting them later.
The pump and water treatment unit were bulky and were to go in the corner next to the water tank. After consulting others and doing some research (good value for money), I bought the 300-litre drinking water filter set from SVB. I already had the pump from Tigerexped.
What cost me time again was the mix of hose diameters. The water tank filler neck was 38 mm, my water pump was 10 mm and the filter was 19 mm. But what really annoyed me was that, depending on the seller or manufacturer, either the internal or external diameter was specified. So I also had to get some hose reducers.
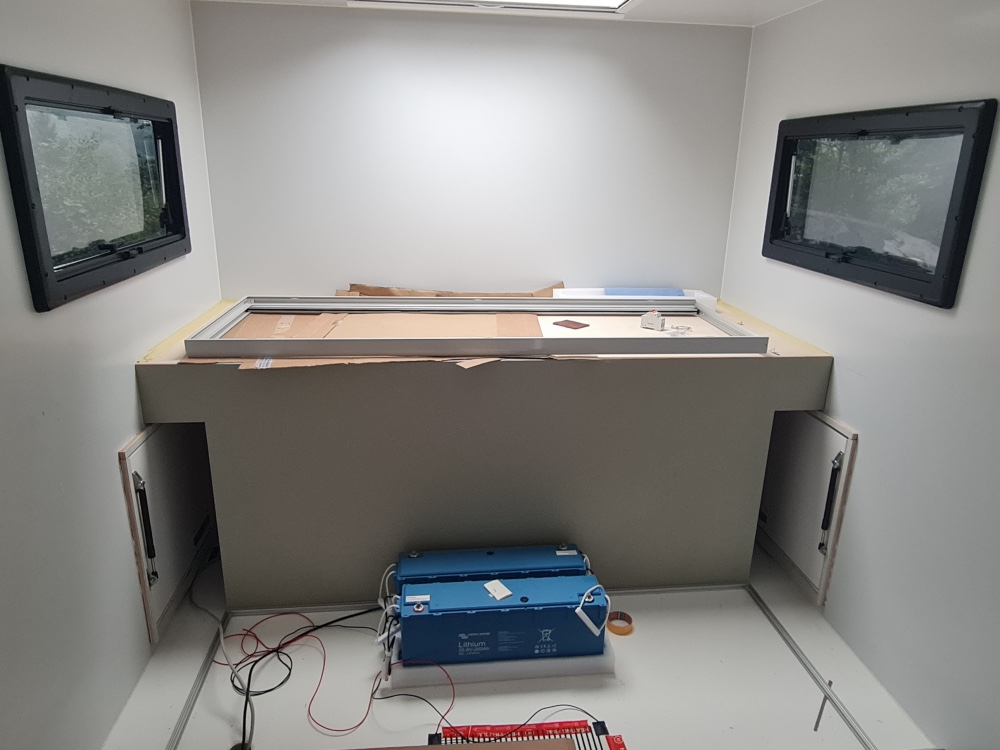
It turned out to be the right decision. I’d cut a piece of aluminium sheet to size, onto which I mounted the pump and the filter. I’d drilled holes so that I could then glue the plate into the cabin and rivet it in place. At the same time, I also drilled two holes in the water tank for draining and filling.
Rails
Whilst I was mulling over the paint debacle, it occurred to me that it would be better to fit the air rails and the ones with the piping groove before painting. The risk should be lower if I glue and rivet them in place before painting 🤔
Two airline rails to secure the sand panels and the airline rail with a cord nut? I won’t be fitting an awning (due to weight and cost) and, as with the Dog.O.Mobil, I’ll use a tarpaulin on a cord rail as a solution.
I sourced the airline rail with a cord nut specifically from kurierbedarf.com
Paintwork - Parts Two, Three and Four
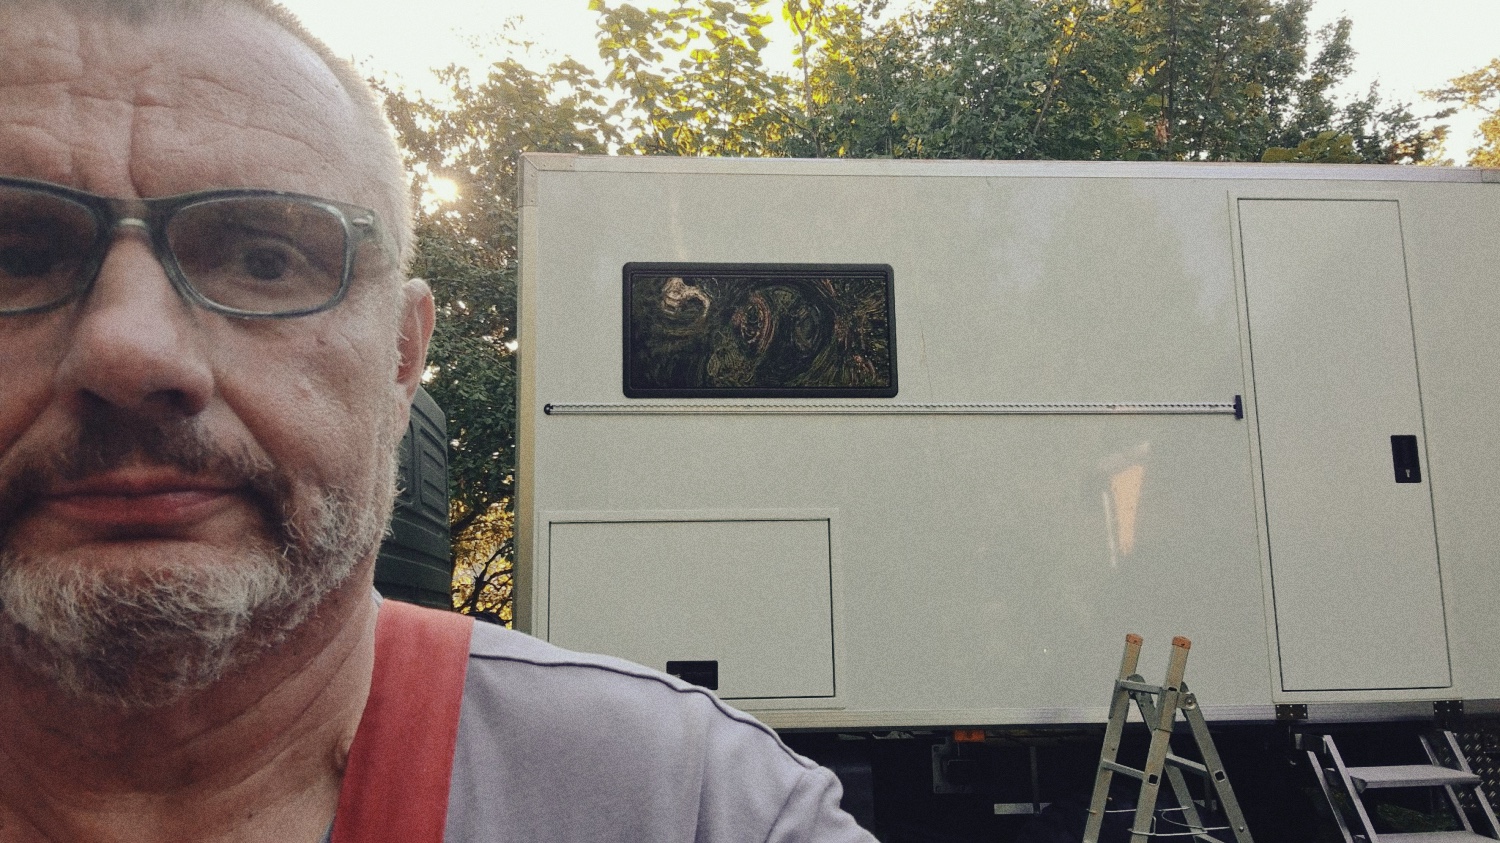
It was late September and still dry and warm, so, after consulting with Jochen, I had sanded down the cab and the aluminium edges and cleaned all the surfaces, including the driver’s cab, with acetone thinner. Then the aluminium profiles were painted with a two-component primer and everything was masked off. Masking it all off felt like an eternity – in other words, almost two days.
And then the day arrived
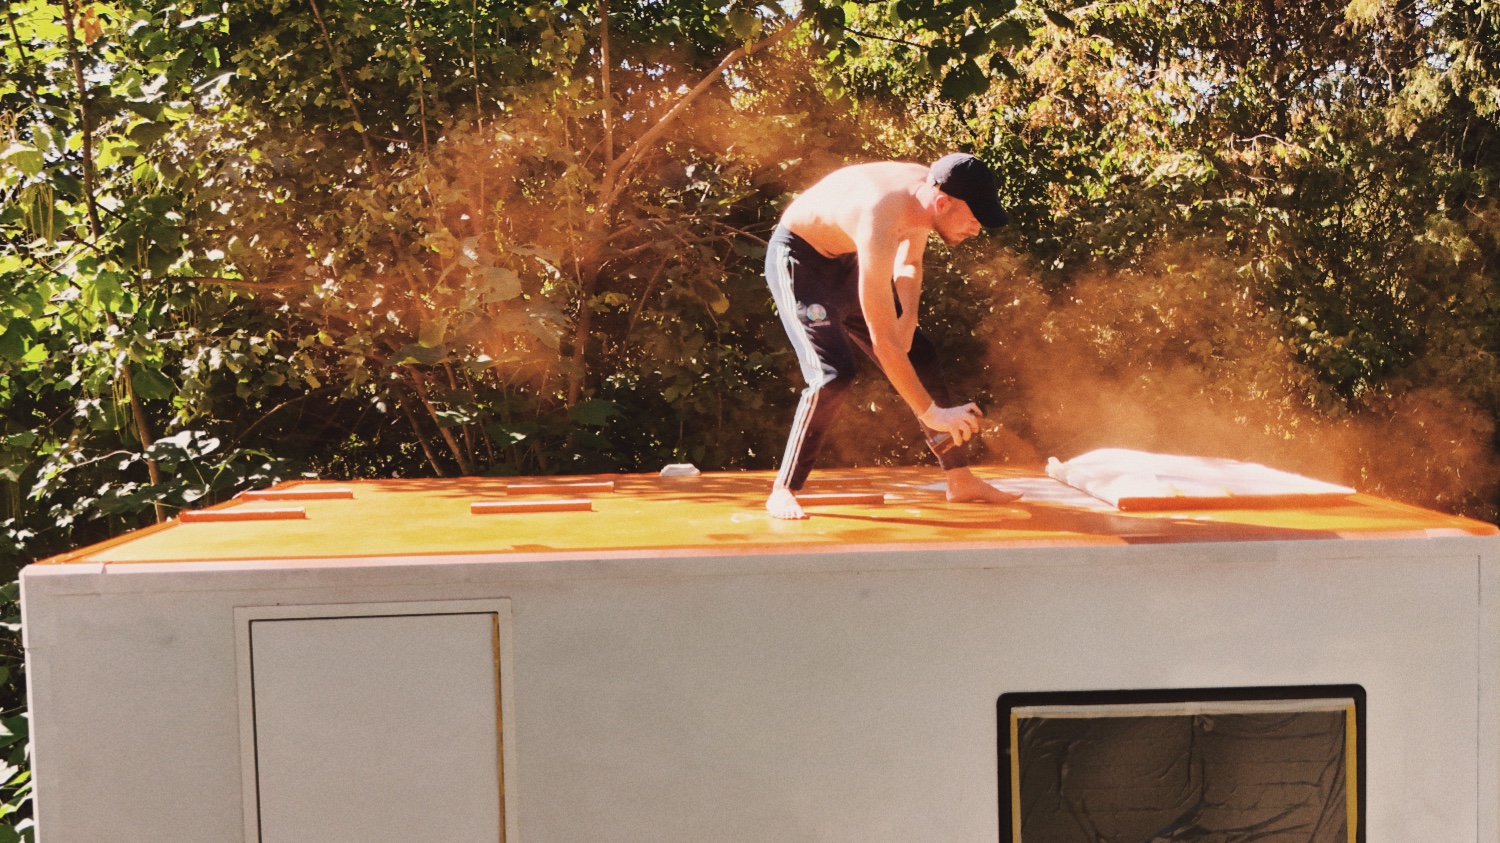
First, the roof was finished, and after 45 minutes we moved on to the cab.
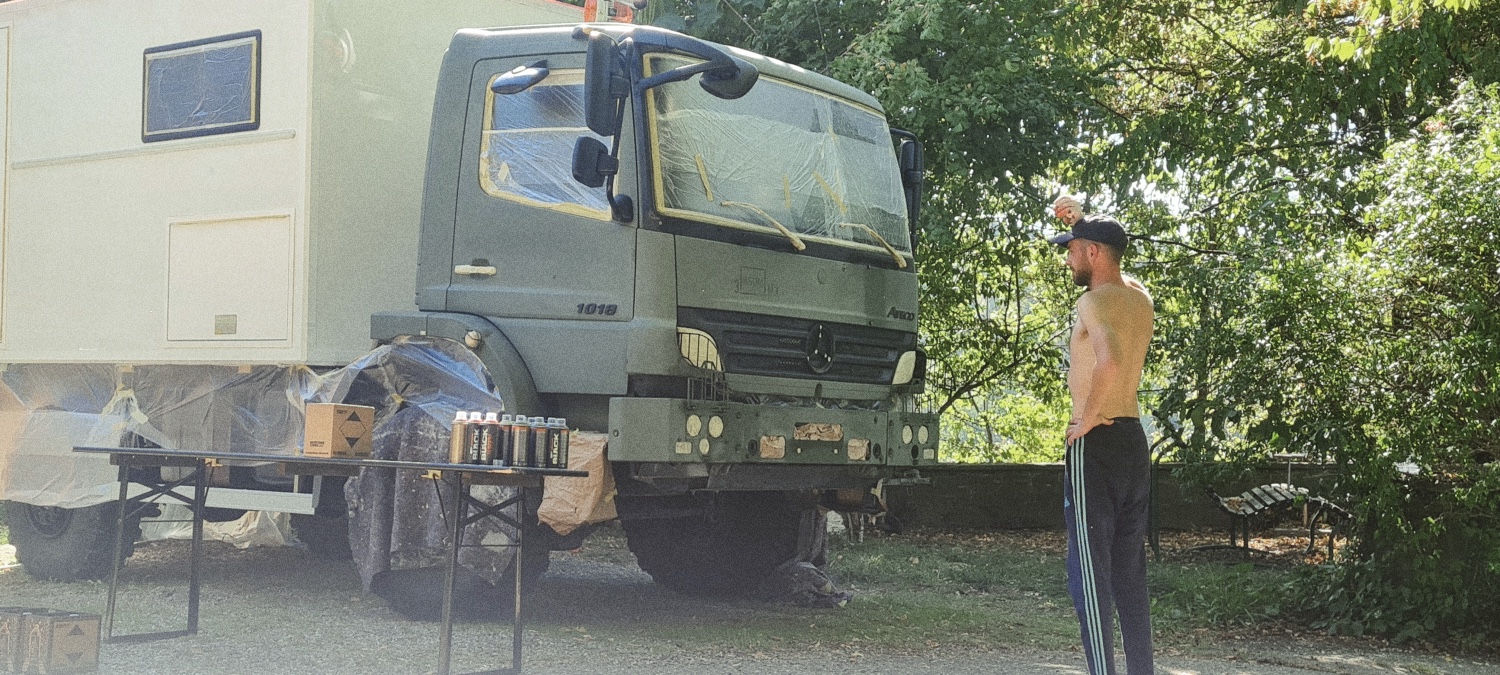
What can I say? I’ve realised what I’m not good at and would rather leave it to someone creative
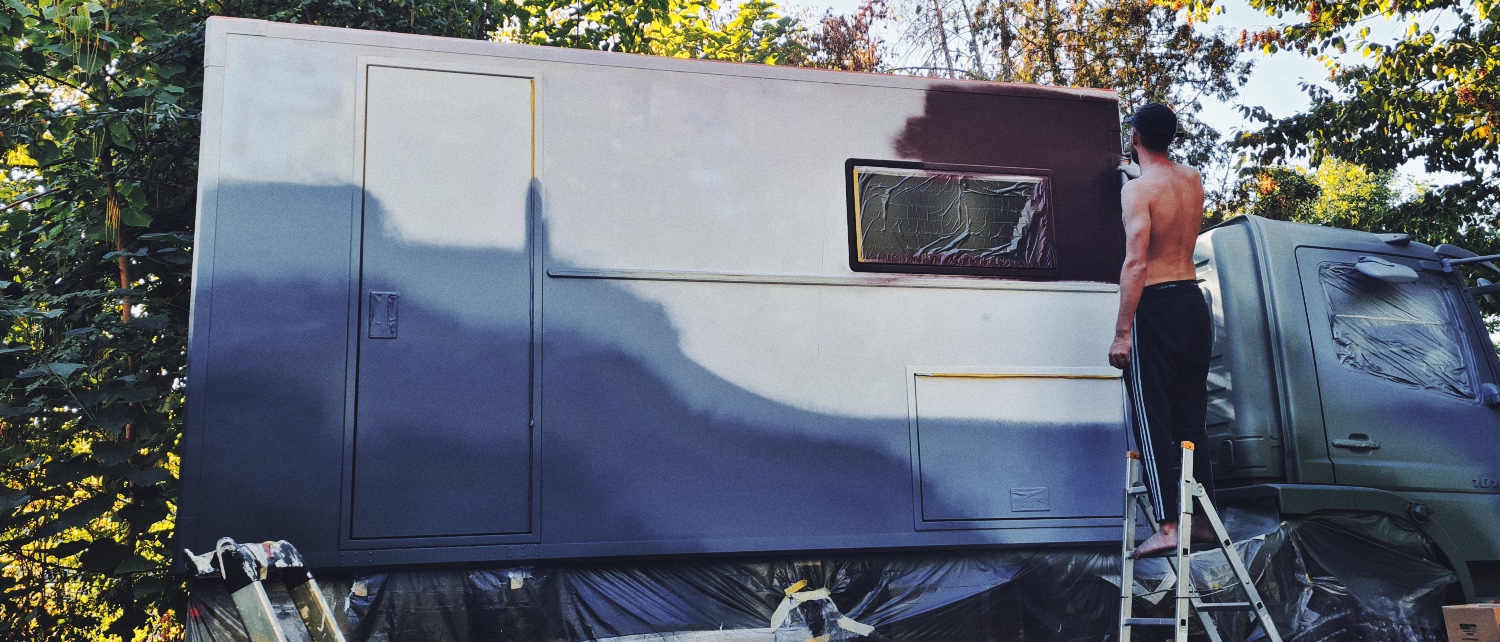
After a break, we carried on

Once the clear coat was on, I felt really good. A big thank you to Jochen!!!
The next day, I removed the film and the masking tape. Apart from two surprises, it all went well. Firstly, the tape hadn’t come off completely on two mirrors and three windows, so we spent an hour using proWIN ORANGE Power (acetone – wheel rim cleaner hadn’t done much!) to remove the residue. When removing the adhesive tape from the stainless-steel piano hinges, a few white marks also appeared. It was just as well that I could simply spray-paint over them.
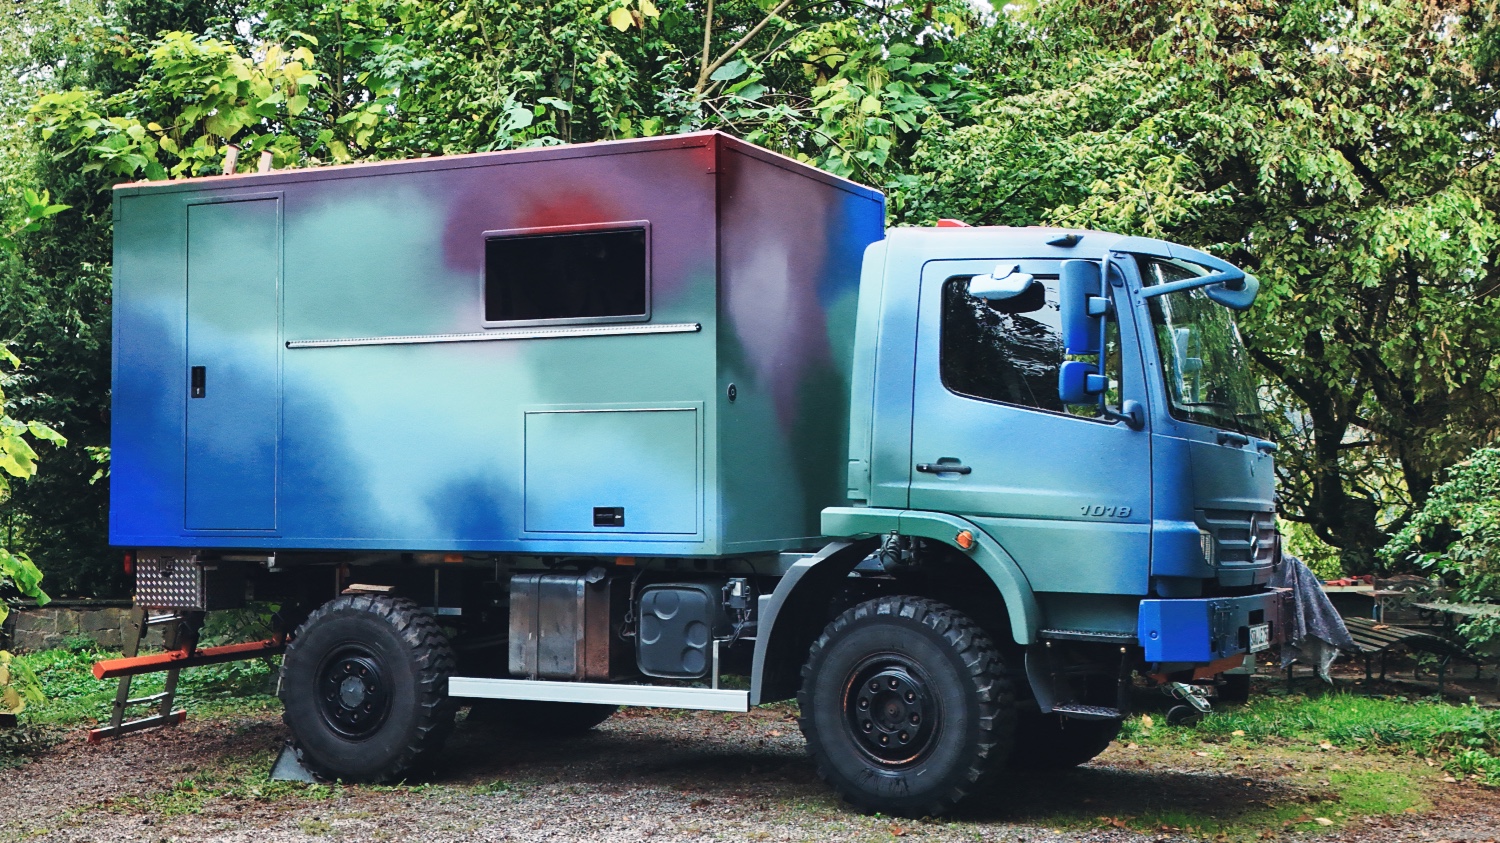
Floor
During the breaks from painting, we chose the linoleum flooring from Forbo. Once the adhesive (WAKOL D 3360 VersaTack) had been purchased as per Forbo’s instructions, I also bought a 24V heating film with 130W/m² from Mi-Heat, complete with a thermostat and heating film underlay.
The heating film underlay and the heating film were quickly installed. Then I made the mistake of asking KI how I should stick the linoleum down on top of it. In the end, I’d read the WAKOL instructions and stuck the linoleum directly onto the heating foil and the heating foil underlay. There wasn’t much chance of it slipping, as there was so little walkable space in the cabin. The rest would be glued down. Let’s see if the construction would hold up over time!
Note: Linoleum cuts easily with a plunge-cut saw, and once the heating film underlay has been fitted, the floor feels so much warmer.
Solar and WolfBox
Once the paint job was finished, the next thing I wanted to do was fit the Wolfbox G900Pro dashcam’s reversing camera to the roof and hide the cables under the solar panels. It was mid-October by then, and I couldn’t be bothered to do it in the rain.
I hadn’t found any useful information (e.g. angle of inclination) on mounting the reversing camera on the roof of a lorry at a height of 345 cm. The good thing was that the camera and the cable could be separated, so I just ran the cable.
I’d already attached the solar panel brackets to the rail and connected the Y-cables to the panels. With a bit of help, I managed to get the two 24 kg solar panels onto the roof. After about 15 minutes, they were secured and the cable was hanging inside the cab. I planned to fit an ABB SD200 isolator switch (25A, 2-pole) later that evening so that I could disconnect the solar panels if necessary.
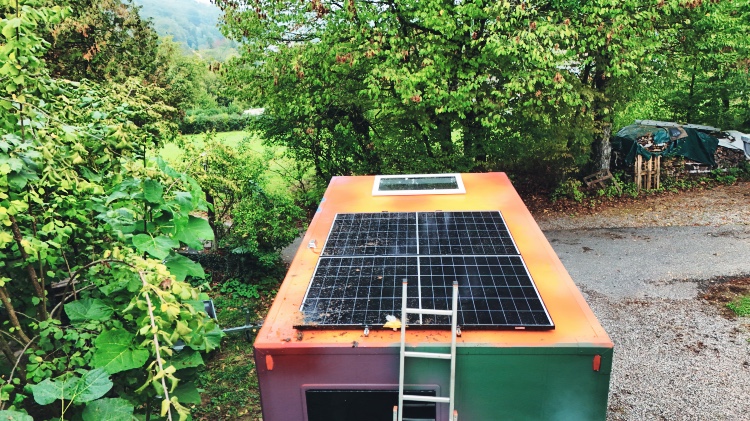
The timing was good, as it started to rain that evening. That meant I didn’t have to carry on clambering around on the roof.
I’d complete the rest of the Wolfbox installation over the coming weeks.
Latest Articles

Finally Cartagena after 30'700 km
The drive north from Al Bosque Camping didn't go as I had imagined right from the start. I had had enough of dirt roads since NP Angel and wanted to spend my last few weeks on paved roads.

Closer to the end - South Colombia till Medellin
At the border between Ecuador and Colombia, in Puente Internacional de Rumichaca, I spent most of my time trying to find a parking space on the Ecuadorian side.

Ecuador - La Balsa to Tulcan
I crossed the border to Ecudor at La Balsa. Customs in Peru took 10 minutes, as did immigration in Ecuador. Adounas Ecuador then took almost 1.5 hours.

Lima to Ecuador
The Dog.O.Mobil was only a little dusty when I picked it up near the airport. Jose Luiz, the owner, had even sent me a video that weekend. He took his job seriously.